Karlene's Workshop

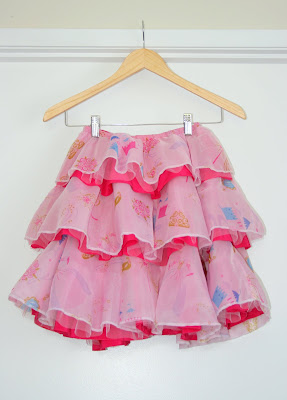
Layered circle skirt

  • 20 October 2009 8:42 pm

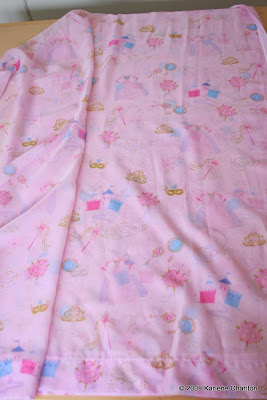
For my next “princess” skirt for the nieces I made this ruffled one from a Barbie print curtain that my mother-in-law gave me.

The curtain looked brand new, it was from the in-laws new house in the bedroom that our boys sleep in when we stay, and has now been replaced. I just knew it would make an awesome fairy princess skirt.

I’m not saying which niece is getting this one but if any of my family are reading this they can probably guess. Shh!

It is made from three circular layers of different lengths, with gathered tulle strips sewn on the lining layers. “What?” you say, just like this:

I made a circular skirt pattern for the longest layer and marked the two shorter ones on it, then cut them all out.

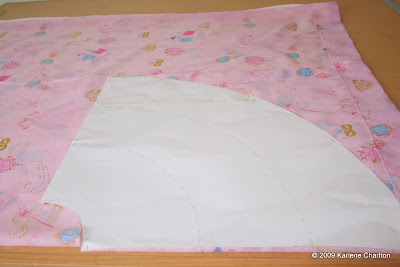
This is what the cut pieces looked like:

Then I did the same with the lining layers. Yip, this skirt has six layers, which makes it very interesting to sew on elastic for the waist but more about that later.

I’ve been storing some pink tulle in my stash for years, waiting for a project just like this to use it all up. The tulle was strip cut into pieces then gathered into a ruffle.

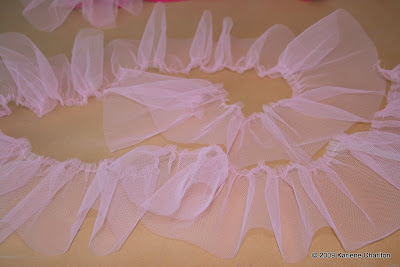
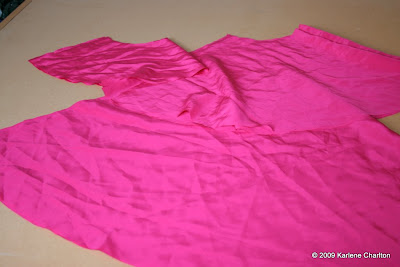
I sewed the ruffled tulle strips onto each layer so the edge was aligned with the hem. For the hems I just used a zig-zag stitch, I really couldn’t face properly hemming all that fabric! This picture shows the top layer with the ruffle stitched on.

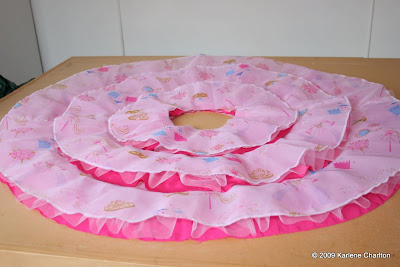
I had to put this picture in because I just loved how the skirt layers looked on top of one another. For some reason it makes me think of a giant wedding cake!

Then came the elastic. I knew I would have a real problem trying to sew through 12 layers if I just folded the top over, so I joined the outer and the lining first, slipped the elastic on, then stitched a casing seam under the elastic to hold it up. Hope this makes sense, it is quite hard to explain.

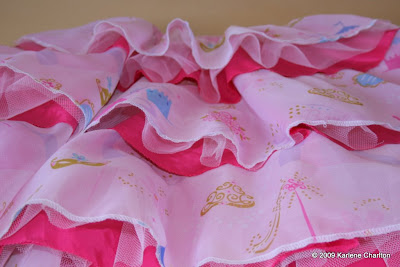
All done. This is my favorite picture, the angle shows off the layers nicely.

Now I just have to make some kind of flower circlet headdress thing.

  • Share/Save/Bookmark
  • Pakalina
    Beautiful work...and thanks for the tutorial. I think I may try one.
  • Hi, love this tutorial! I would love to make this skirt, but I do have a question. I will tell you that I am a novice at sewing. The only thing I don't understand is that in the first picture of the tulle layered onto the solid pink the circle in center is large. Then as the tiers go up the waist gets smaller. Here is my question: What are the tiers sewn to if the center is getting smaller as it goes? I guess I dont understand how you attached it all together?

    I am a custom cake decorator www.bakingsweetmemories.com, I am not a sewer. I would love to become one though!!!
  • KarleneC
    Hi Rebecca, thanks for your comment. To answer your question, the waist is actually the same size in each layer, all six layers were stitched together at the waist! Was wondering if you meant the ruffled tulle strip - These were just sewn on the bottom edges. Hope this helps :-)
  • Mary
    I love your work! Your tutorial is very interesting and I learned a lot form you. I hope you continue giving us all that lovely ideas.
  • Tamsin
    Really appreciate the photo's at each stage (since I'm anenthusiastic but not a confident sewer). lucky neiece!
  • Kathryn
    Very pretty!
  • Wow, that is beautiful! Thanks for this tutorial!! I'm definitely bookmarking it for later use!
  • This is so pretty! My daughter would LOVE it! Thank you so much for sharing this AWESOME idea!!
  • Thank you for sharing this tutorial. It is adorable! My girls would love this skirt.
  • Great tutorial and good reuse of materials. Looks good. Just a for what its worth: The waist band bulk could be reduced by cutting a seperate bnad of material double the width of elastic plus two 1/2 seam allowances and cut length to waist band opening. Sew strip right sides together at ends and leave opening to set elastic into. In other words sew up 1/2 inch back stitch well, skip seam seam width of elastic and then resume seaming seam after to other end. Open up seam by pressing. Fold over now circular strip and press. Pin to top of skirt right sides together and sew 1/2" seam all the way round. zigzag or serge raw edges together. press seam down toward skirt. Inset proper length of elastic with safety pin or bodkin through hole in waistband seam all the way around to same hole. Sew two ends of elastic together well flat. One lapped over the other and stretch it back into hole. Handstitch hole closed. Viola' simple and reduces bulk.
  • This is lovely! I bet all those ruffles twirl beautifully!! I posted a link to your tutorial on Craft Gossip Sewing:
    http://sewing.craftgossip.com/tutorial-tiered-c...
    --Anne
blog comments powered by Disqus Top